|
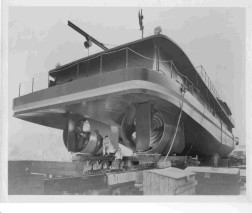
Ever seen a
towboat out of the water?
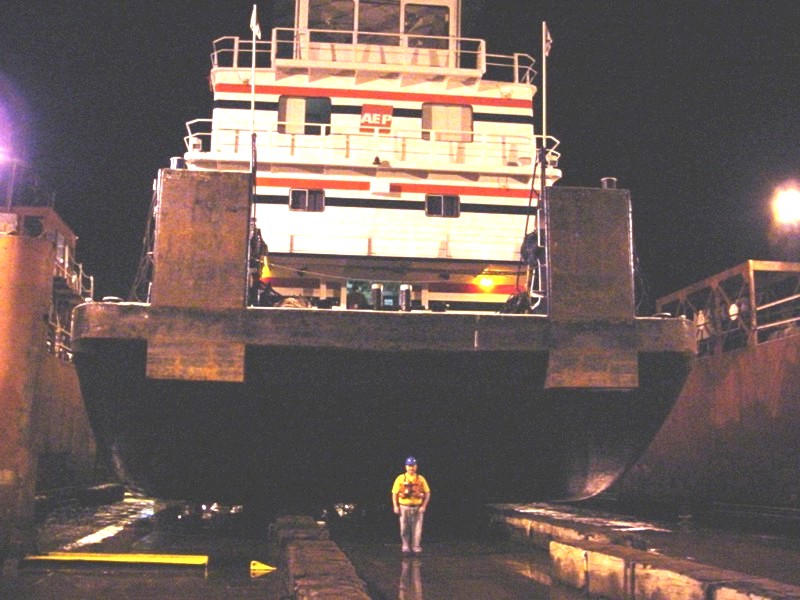
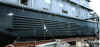
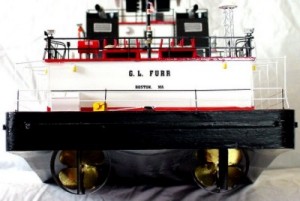
 Me standing in front of 140' x 42' m/v G L FURR
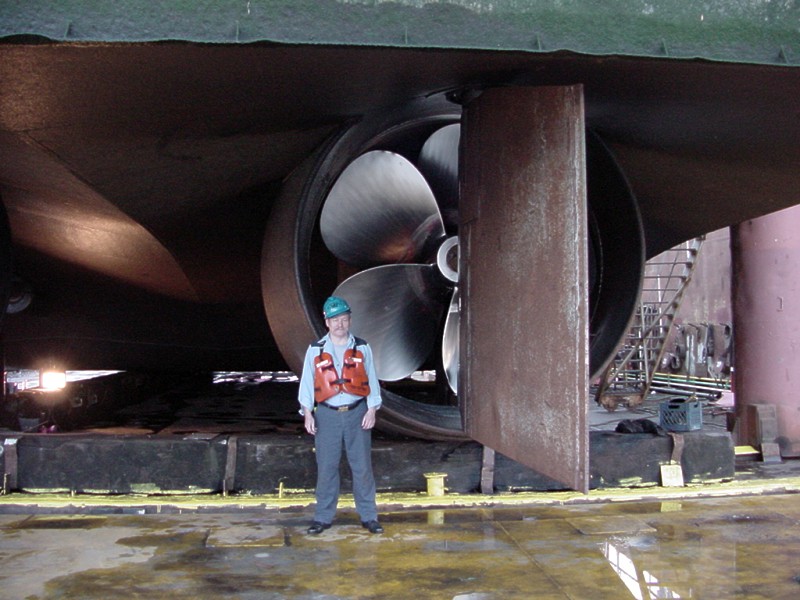
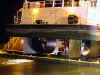
  Chief Tom Hunt at stbd kort
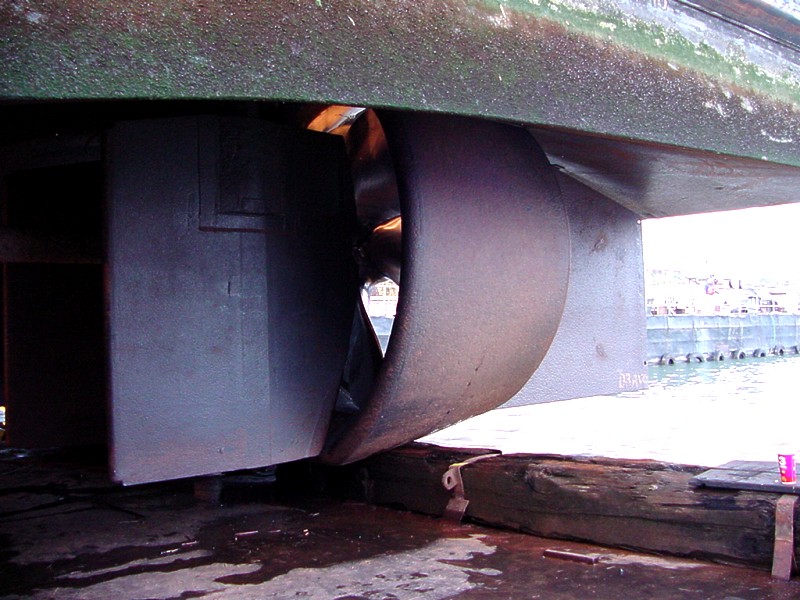
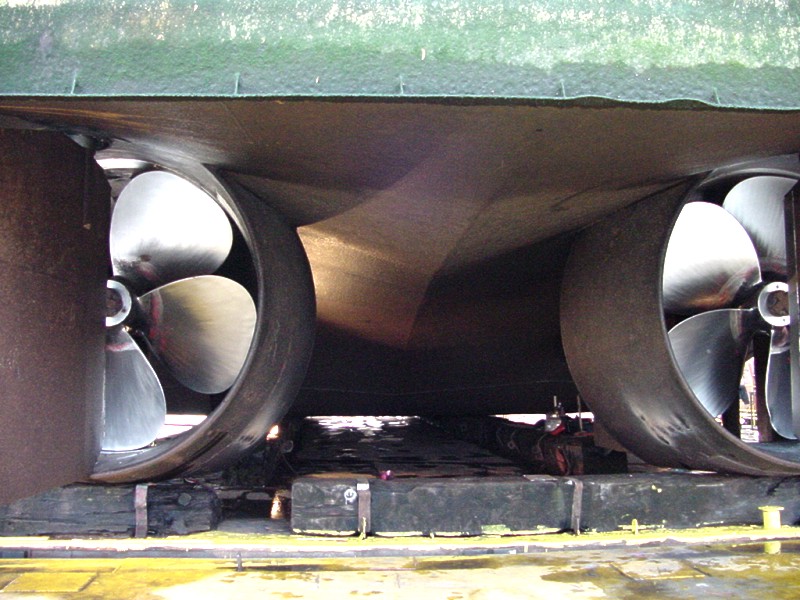
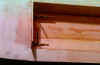
 port wheel
 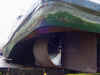 port stern
 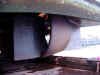 port rudders & kort
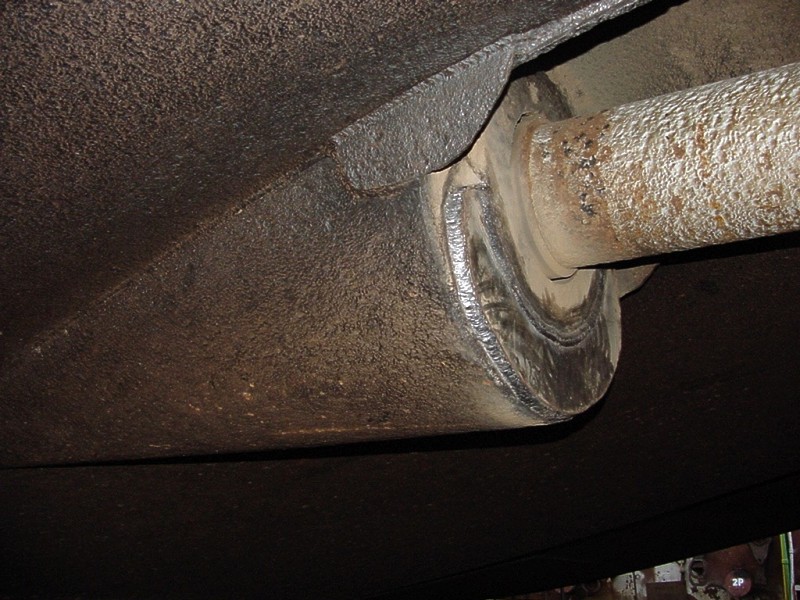
  shaft
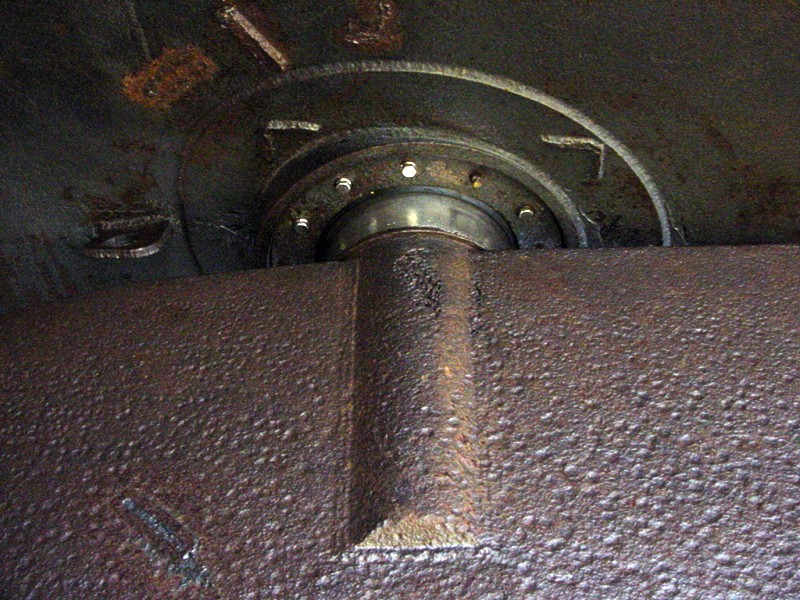
shaft
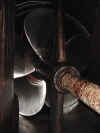 shaft
shaft  stuffing tube
  stuffing tube
 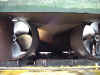 korts
korts
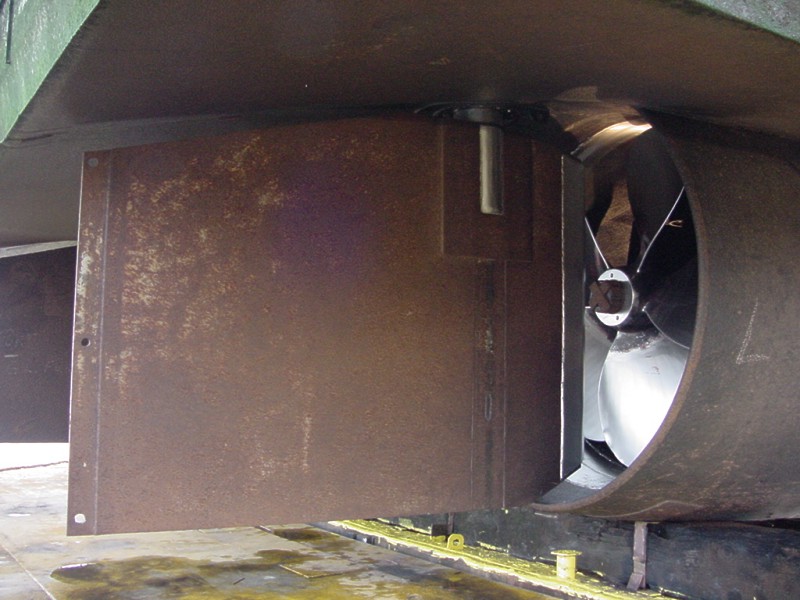
 steering rudder
 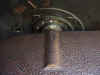 flanking rudder bearings
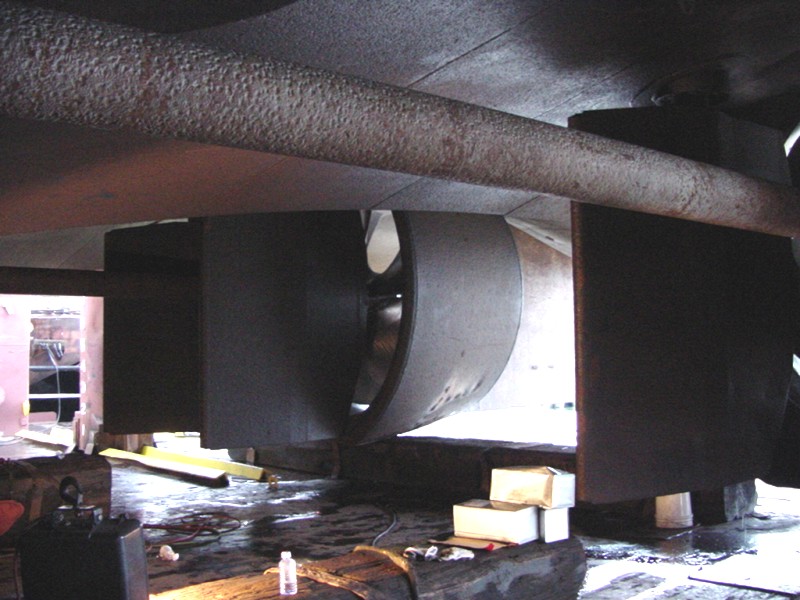
  tunnel area
 port engine cooler
 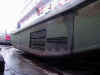 port gear box cooler
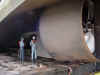
 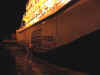 Capt. Wallace, he's 6' 1"
 Time elapse photos without tripod. Unusual effect
 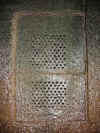 sea chest
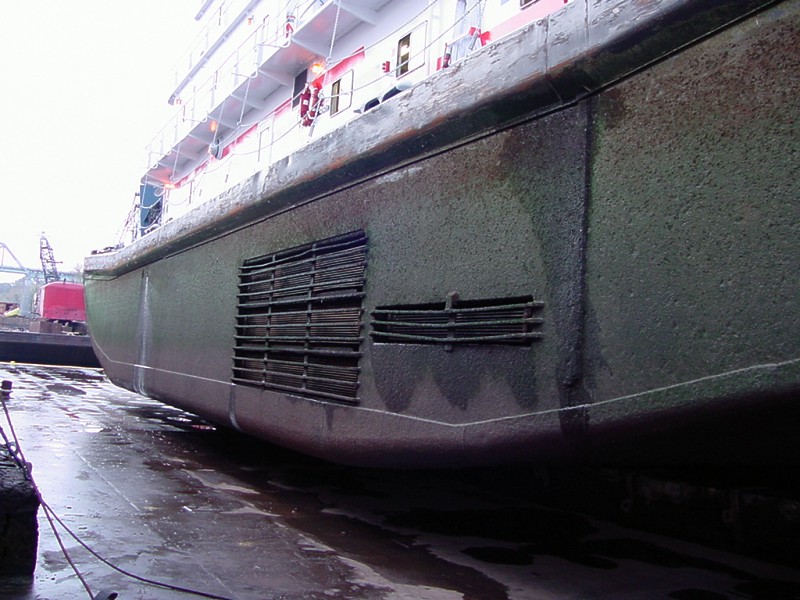
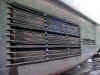
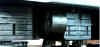
 stbd coolers, coolers above stair railing are for generators
 Notice the strings hanging down from the hull. It is believed these are the
larvae of the Mayfly and if one of these suckers land on your neck, they can
sure bite the heck out of you.
Notice the strings hanging down from the hull. It is believed these are the
larvae of the Mayfly and if one of these suckers land on your neck, they can
sure bite the heck out of you.
 Ever wondered what it looked like just before you got run over by one of these
babies?
Ever wondered what it looked like just before you got run over by one of these
babies?
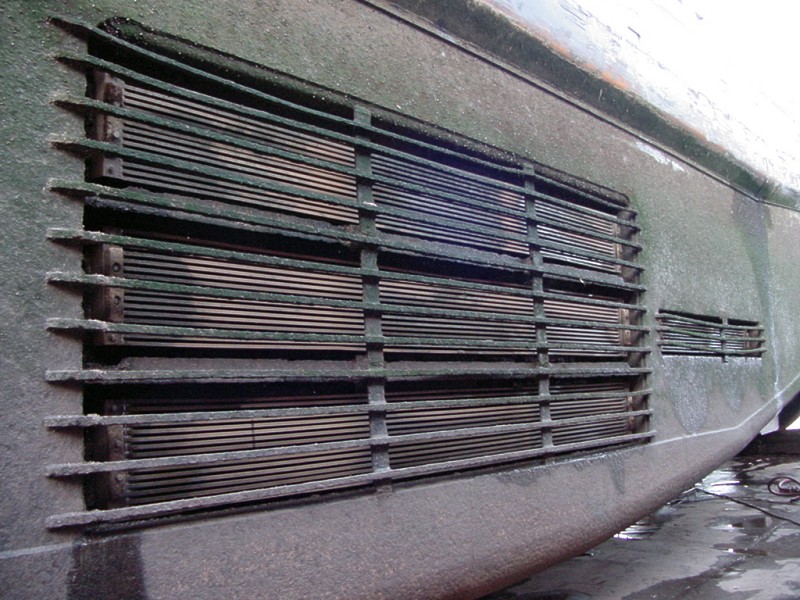
 SKIN COOLERS are welded to
the sides of the hull. Another type of cooler is a series of pipes on the bottom of
the hull called KEEL COOLERS.
GRID COOLERS are
like radiators for the engines, gear boxes, and
generators placed in recesses in the hull.
SKIN COOLERS are welded to
the sides of the hull. Another type of cooler is a series of pipes on the bottom of
the hull called KEEL COOLERS.
GRID COOLERS are
like radiators for the engines, gear boxes, and
generators placed in recesses in the hull.
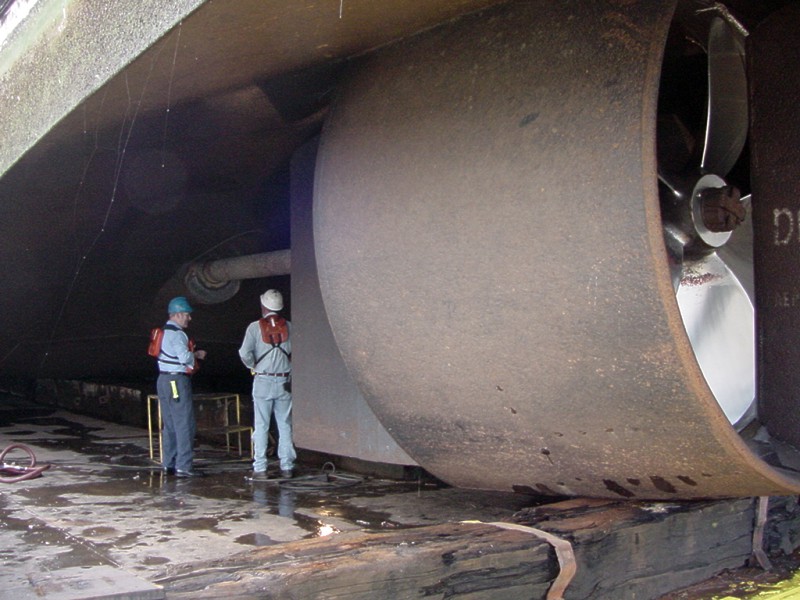
 Here is the starboard
steering rudder, kort nozzle, and one of the flanking (backing) rudders of a 126' 3600hp
towboat.
Here is the starboard
steering rudder, kort nozzle, and one of the flanking (backing) rudders of a 126' 3600hp
towboat.
Building a
simple frame hull....
"Towboat" Joe's technique
 Here's a basic frame work for a 1:48 scale triple screw towboat 200'
x 54'. With a hull so large ( 50" x 13 1/2" ) I prefer to
do the stern section separate from the main hull. I "break" it where the deck
meets the angle for the raised stern. That is usually where the tunnel stern starts flattening
out for the bottom of the hull. Notice that the hull side extends 4 1/4" past where I
stopped the
bottom sheeting. That is where the flat part of the bottom starts the rise to the
tunnel
stern.
Here's a basic frame work for a 1:48 scale triple screw towboat 200'
x 54'. With a hull so large ( 50" x 13 1/2" ) I prefer to
do the stern section separate from the main hull. I "break" it where the deck
meets the angle for the raised stern. That is usually where the tunnel stern starts flattening
out for the bottom of the hull. Notice that the hull side extends 4 1/4" past where I
stopped the
bottom sheeting. That is where the flat part of the bottom starts the rise to the
tunnel
stern.
 Here shows the framing of the tunnel stern. Notice the three tunnel areas cut into the framing. This will be the
end that will be mated to the main hull. Small sheets will go from here to the flat bottom
frame. Offsetting the joints like this will also make a stronger joint.
Here shows the framing of the tunnel stern. Notice the three tunnel areas cut into the framing. This will be the
end that will be mated to the main hull. Small sheets will go from here to the flat bottom
frame. Offsetting the joints like this will also make a stronger joint.
 Here is an overhead view of the tunnel stern bottom and the port side showing it
partially sheeted. Notice reinforcing
angles on the cross frame to increase strength. Always build framing so that each sheet
will glue together on a supporting frame. Here is an overhead view of the tunnel stern bottom and the port side showing it
partially sheeted. Notice reinforcing
angles on the cross frame to increase strength. Always build framing so that each sheet
will glue together on a supporting frame.
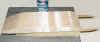
 Here are the two parts joined together. Next thing is to
glue 1/2" blocks into the outside corners. This not only increases strength, but also
gives you wood to sand into when rounding off the corners. Next I like to glue a 1/4"
or 1/2" sheet of Styrofoam to the bottom with a sheet of 1/4" or
thinner plywood on top of that. It gives me something to screw into if needed plus adds
more
strength to the bottom.
Here are the two parts joined together. Next thing is to
glue 1/2" blocks into the outside corners. This not only increases strength, but also
gives you wood to sand into when rounding off the corners. Next I like to glue a 1/4"
or 1/2" sheet of Styrofoam to the bottom with a sheet of 1/4" or
thinner plywood on top of that. It gives me something to screw into if needed plus adds
more
strength to the bottom.
Another frame
hull can be viewed on the Bruce Darst page.
 Here's the hull of the Bruce Darst (a Jeffboat design
hull) I carefully mark off the placement of the steering and backing rudders and
I usually install the sleeves for the rudder struts first thing. Then I measure
for the shafts and drill holes for them. That way I can line up the shafts to
figure the center line placement of the Korts. If I use a can with a seam
I usually epoxy the seam to the hull. It's far less noticeable in that location.
Here's the hull of the Bruce Darst (a Jeffboat design
hull) I carefully mark off the placement of the steering and backing rudders and
I usually install the sleeves for the rudder struts first thing. Then I measure
for the shafts and drill holes for them. That way I can line up the shafts to
figure the center line placement of the Korts. If I use a can with a seam
I usually epoxy the seam to the hull. It's far less noticeable in that location.
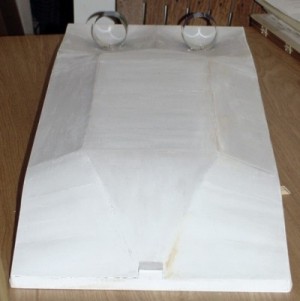
Building a Foam Hull.... "River
Bill" Zumwalt's technique
Using the Hot Wire- Foam Cutting
"Bow" .... this
drawing shows how "Two Templates" from your plans - Side Hull Profile, are made,
then placed - "On Each Side" of the foam block. The templates must be straight
and aligned correctly, meaning directly across from one another, to insure the hull is cut
square. The two - templates, must also be cut correctly, allowing
for the thickness of the coverings of wood and Fiberglass materials too. This is a must do
- task, in order to keep the model in its correct scale size!
ADJUSTING THE TEMPLATES
.... By this - I mean, if you chose 1/8" thick balsa sheeting
to cover the foam core hull - for example. Then you must ( Remove ) this same amount from
all 4 sides of the Foam Block, prior to adding the Side templates Plus you must remove an
additional 1/16" off each of the foam, to allow for the fiberglass & Resin
materials, in their thickness - as well. These two adjustments to both - foam block and
templates, insure the finished hull will be exactly to scale. "So this is critical in
required tasks, before your ready to use the Hot Wire and carve the foam hull. Once the
templates are adjusted, its time to heat up your - HOT WIRE foam cutter. And Draw the Bow
- Gently along the templates - slowly with a steady pull, to carve away the excess
foam.... ( SEE NEXT STEP BELOW )
Using the Hot Wire-
"Hand Wand" ....Once the foam Hull Core - is cut out with the hot wire knife
& bow, gently sand the hull core and check measurements, the block of foam has got to
be - Square in Shape." The next task will be to carve out the "Tunnel
Stern" for the "Wheels" = Props and Rudder systems to be installed later,
by changing to the Small - HAND WAND. REMEMBER, the Tunnel Hull - Stern, must also be
carved out & adjusted in correct depths, to allow for the thickness of woods &
Fiberglass Covering too, since this area will later be covering too. In this drawing, you
can see the "Tunnel Hull" is being "SPOONED OUT" with the hand wand.
Note ... The wand ( Its Wire ), may want to bend out of shape - as you use it. If it does,
your pulling a bit to hard, so adjust the voltage a bit higher, as needed. "Just
don't get the wire - TO HOT, Noting the hand wand uses a shorter - wire, that will heat
faster, than a longer one!
SPECIAL NOTE..... Another way to
make a Hand Wand, is to use some heavy "Solid Copper" wire, mounted into an old
solder gun. Shaping the wire to required cutting shapes, then heat it the solder gun and
use it to shape foam objects or sections of the hull!
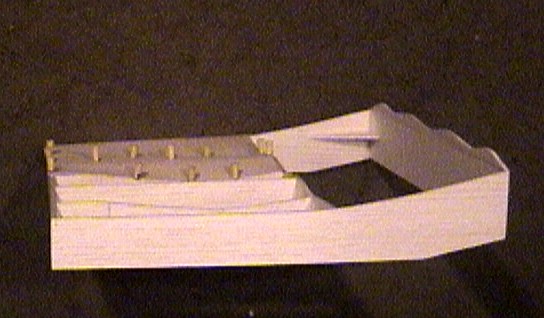
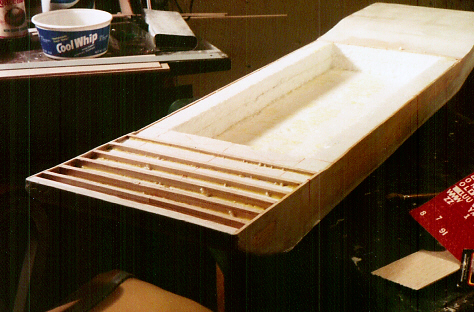
The "Thomas K." as
the Foam - Hull, was being Built
 The Deck Plate - awaits the 1/8" balsa sheeting. Bottom, side,
Bow & Stern Plates already installed already, the deck plate - Frame Work, is
completed. Note the area the r/c
systems will be installed into, hasn't covered in wood sheets - yet! The Deck Plate - awaits the 1/8" balsa sheeting. Bottom, side,
Bow & Stern Plates already installed already, the deck plate - Frame Work, is
completed. Note the area the r/c
systems will be installed into, hasn't covered in wood sheets - yet!
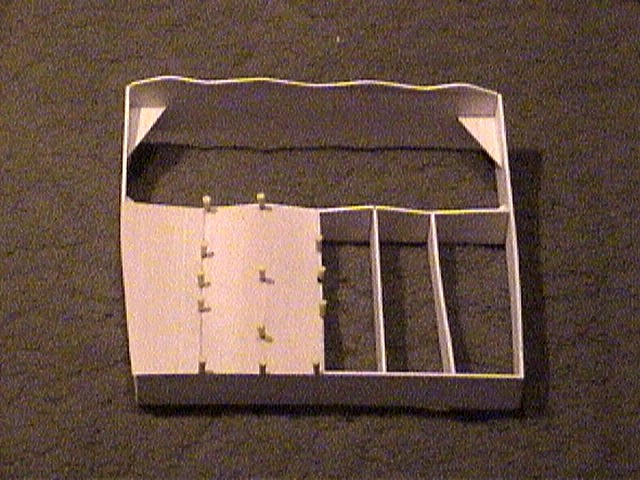
 The ( 6 ) Rudder Sleeve Tubes, are being added to the stern, plus
the drive shafts have been fitted. Note
the area of the r/c systems, is now also sheeted ( Inner
- Rc Bottom Hull Plates ) and all wood
seams have been filled, sanded and sealed/ So the hull is ready for glass cloth and resin. The ( 6 ) Rudder Sleeve Tubes, are being added to the stern, plus
the drive shafts have been fitted. Note
the area of the r/c systems, is now also sheeted ( Inner
- Rc Bottom Hull Plates ) and all wood
seams have been filled, sanded and sealed/ So the hull is ready for glass cloth and resin.
 The deck plate - sheets applied, work continues on the "Rudder
Sleeve Tubes" to seal them and the stern - deck plate. Sealing the sleeve tubing, was done with J-B Weld Automotive
Epoxy, because 50/50 hobby epoxy will not withstand moisture for long periods and can come
loose! The deck plate - sheets applied, work continues on the "Rudder
Sleeve Tubes" to seal them and the stern - deck plate. Sealing the sleeve tubing, was done with J-B Weld Automotive
Epoxy, because 50/50 hobby epoxy will not withstand moisture for long periods and can come
loose!
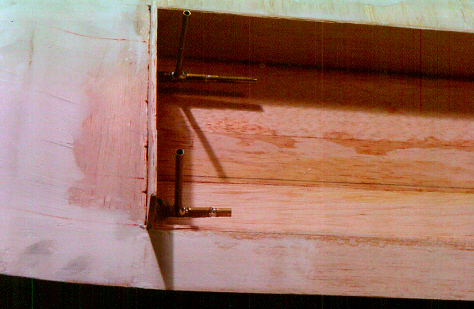
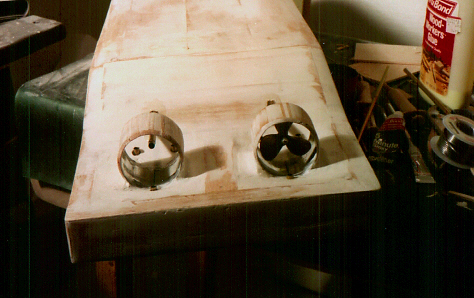
 The Kort Nozzles are installed into the stern - Tunnels of the hull
( Note the Port side - Wheel, or Prop, is already
Installed! ) The Kort Nozzles are installed into the stern - Tunnels of the hull
( Note the Port side - Wheel, or Prop, is already
Installed! )
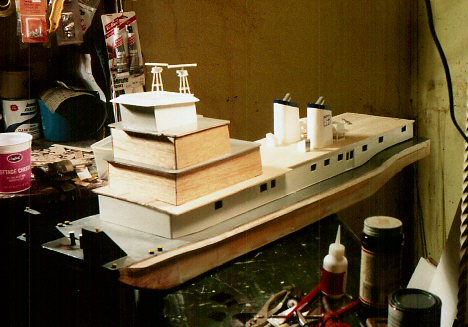
 The Thomas K. nearing
completion, note its Structures - taking shape, made of mostly balsa wood, with some
plastic's, the structures details include a fully Detailed - Helm, and All Working
Nav.
Lights & Radar. The Thomas K. nearing
completion, note its Structures - taking shape, made of mostly balsa wood, with some
plastic's, the structures details include a fully Detailed - Helm, and All Working
Nav.
Lights & Radar.
 The
completed 1/48 Scale - 4 channel r/c operated model, after taking several "St. Louis
Admiral Club" Awards. Powered by 12 volt - Gel Cell Battery, with twin "Homemade
Electronic" Speed controls and Twin - Dumas motors, and prototype Duel - Rudder
Steering. Capable of Pushing - over 30+ scale 200' barges, each
barge = 50" in length, for a full scale tow, over 26 feet long - Overall. The
completed 1/48 Scale - 4 channel r/c operated model, after taking several "St. Louis
Admiral Club" Awards. Powered by 12 volt - Gel Cell Battery, with twin "Homemade
Electronic" Speed controls and Twin - Dumas motors, and prototype Duel - Rudder
Steering. Capable of Pushing - over 30+ scale 200' barges, each
barge = 50" in length, for a full scale tow, over 26 feet long - Overall.
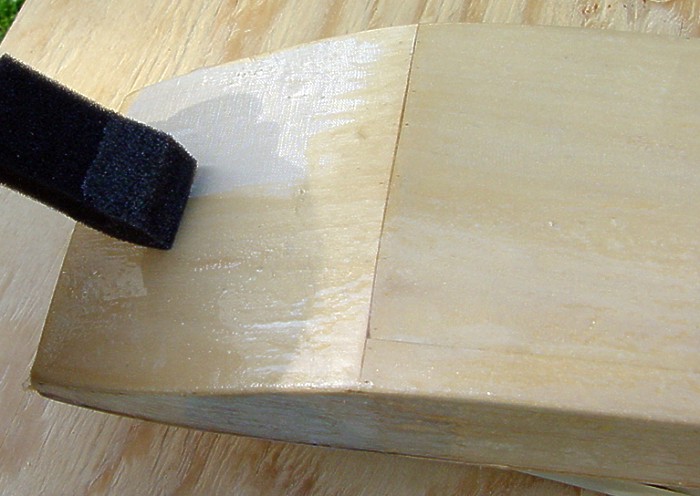
Fiber glassing
a hull
 I start off by taping the cabins off so spray adhesive won't get on them. The
mat I am using is 3/4 oz fiberglass mat.
Spray adhesive to the hull and lay the mat out, cutting the contours as needed. After the
mat is stuck flat to the hull with no raised places, it's time for the first coating of
resin.
I start off by taping the cabins off so spray adhesive won't get on them. The
mat I am using is 3/4 oz fiberglass mat.
Spray adhesive to the hull and lay the mat out, cutting the contours as needed. After the
mat is stuck flat to the hull with no raised places, it's time for the first coating of
resin.
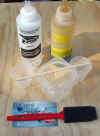 There are two types of resins for this job,
Polyester Resin and Epoxy Resin. I prefer Epoxy Resin because it's virtually odorless
and mixes 50/50. For fiber glassing use Finishing
Epoxy for it is thinner and flows better than regular epoxy
used for gluing. Polyester Resin
is extremely strong in strength and smell. You have to estimate how many drops of hardener
to add to each ounce of resin according to the humidity. Humidity
affects the setup time of Polyester Resin. You'll
need two measuring cups, a mixing cup, stirring
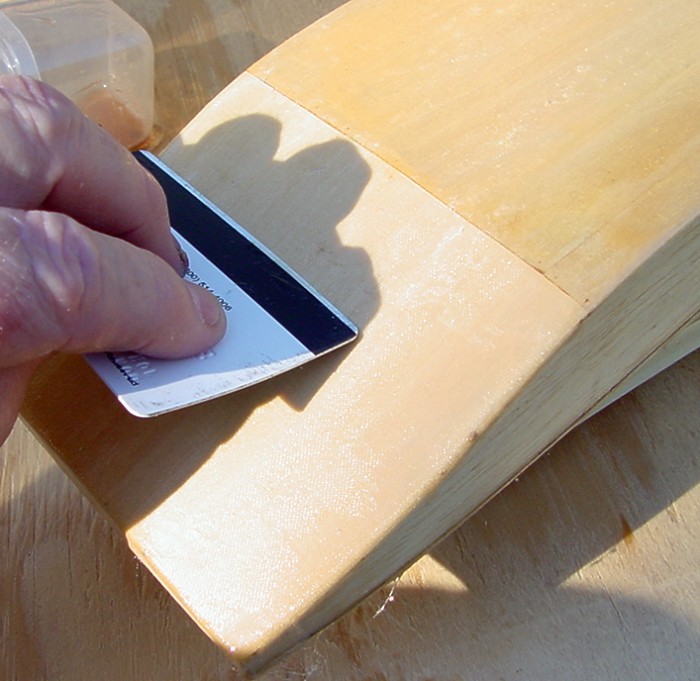
stick, a disposable paint brush, razor blade, and a squeegee.
Old credit cards make the best squeegee I've ever found.
There are two types of resins for this job,
Polyester Resin and Epoxy Resin. I prefer Epoxy Resin because it's virtually odorless
and mixes 50/50. For fiber glassing use Finishing
Epoxy for it is thinner and flows better than regular epoxy
used for gluing. Polyester Resin
is extremely strong in strength and smell. You have to estimate how many drops of hardener
to add to each ounce of resin according to the humidity. Humidity
affects the setup time of Polyester Resin. You'll
need two measuring cups, a mixing cup, stirring
stick, a disposable paint brush, razor blade, and a squeegee.
Old credit cards make the best squeegee I've ever found.
 Apply the first coat by working the resin
into the matt being sure it soaks the mat good and adheres to the hull. How do you know
that it's enough? Easy! The mat virtually disappears.
Apply the first coat by working the resin
into the matt being sure it soaks the mat good and adheres to the hull. How do you know
that it's enough? Easy! The mat virtually disappears.
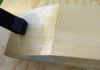
 After the hull is coated, use the squeegee to work
out any bubbles or creases in the mat. Always work
outward with the grain of the mat. When you've worked it to where you can see
the pattern of the mat, then it's making good contact to the hull. If you get
any creases that won't work out, use a razor blade to slice it and it will
usually flatten out.
After the hull is coated, use the squeegee to work
out any bubbles or creases in the mat. Always work
outward with the grain of the mat. When you've worked it to where you can see
the pattern of the mat, then it's making good contact to the hull. If you get
any creases that won't work out, use a razor blade to slice it and it will
usually flatten out.
 Set the hull aside to dry.
keep an eye on it for the next couple of hours, especially if it's a big hull
with overlapped mat. Sometimes, after it has set for a while, it may come loose
or create a bubble where it has come loose from the hull. just take the squeegee
and lightly rub it back down.
Set the hull aside to dry.
keep an eye on it for the next couple of hours, especially if it's a big hull
with overlapped mat. Sometimes, after it has set for a while, it may come loose
or create a bubble where it has come loose from the hull. just take the squeegee
and lightly rub it back down.
After it has dried, use a sharp knife
to trim of any strings hanging. Next give it a light sanding and brush on another coat of
resin. I usually apply two to three coats of resin after the first
initial coating with the mat. Be sure to give it a light sanding between coats.
After the second coat the hull should start looking nice.
Don't
try to just coat a hull with resin and no mat. Either
type of resin will become brittle and crack easily without the mat. I have found that the one layer of light mat is
sufficient for most hulls. For large heavy hull, you may want to go to a heavier
mat. I buy my mat and Epoxy Resin at Tower
Hobbies.
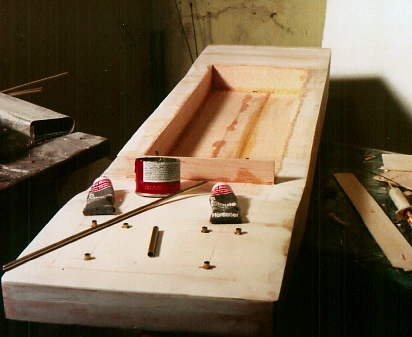
Scratch
Building Kort Nozzles
 I
make Korts out of anything I find that fits the diameter of the wheel I'm using
on the model. I've used everything from 35mm film canisters to PVC pipe. Here is
an anti-perspirant can I cut up with a moto-tool with a fiberglass cut off
wheel. A good way to mark your diameter is to sit the can on the work table,
stack some blocks and sheets of wood to the cut mark, then hold a sharpie in
place and rotate the can. I
make Korts out of anything I find that fits the diameter of the wheel I'm using
on the model. I've used everything from 35mm film canisters to PVC pipe. Here is
an anti-perspirant can I cut up with a moto-tool with a fiberglass cut off
wheel. A good way to mark your diameter is to sit the can on the work table,
stack some blocks and sheets of wood to the cut mark, then hold a sharpie in
place and rotate the can.
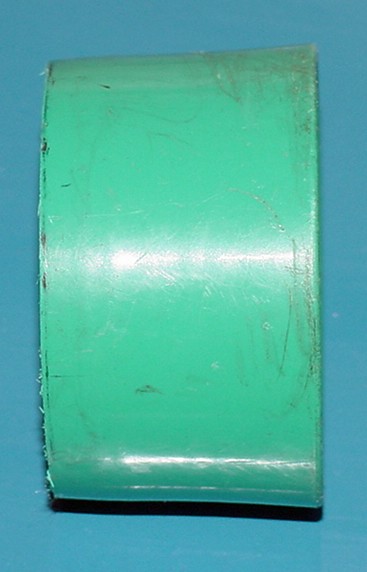
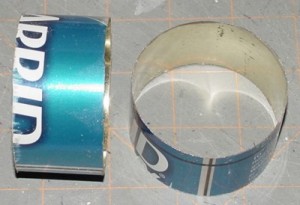
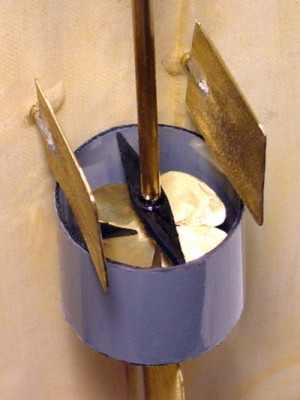 Here
is a Kort made from a plastic cap from an aerosol can. Here you can see the
shaft support carved from bass wood. The wheel and rudders are scratch built. I
use brass rod for a rudder shaft and grind it flat on one side to solder the
rudder cut from sheet brass. Here
is a Kort made from a plastic cap from an aerosol can. Here you can see the
shaft support carved from bass wood. The wheel and rudders are scratch built. I
use brass rod for a rudder shaft and grind it flat on one side to solder the
rudder cut from sheet brass.
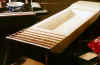
 Here's
a view of a finished boat. A larger photo can be viewed on the G.
L. FURR page. Here's
a view of a finished boat. A larger photo can be viewed on the G.
L. FURR page.
Other views are Bruce
Darst, Geoffrey, and Mr.
Smitty  Want a cheap, easy to make kort?
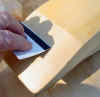
This
is the front part of those cheap $1.00 flashlights that takes two "C"
cell batteries. I just took the lens and bulb reflector out, cut it to the
length I wanted, used a moto-tool with sanding disk to removed the threads
inside and there you go. A 45mm prop fit perfectly inside. I made a couple for
my American Viking. R/C
ADVICE... If you're building a Kort for an r/c
model from a can or plastic that is flimsy, you should make it stronger by
laminating strips of bass wood around the "Kort" to take the
flexibility out of it. You're first choice may be in plumbing supplies or opting
to go the expense of buying a production Kort from someone like Harbor
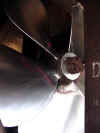
Models.  Here's a photo of a stern showing the Kort nozzles.
|