|
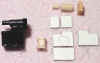
Phil Pace, owner of Vac-U-Boats, sent me one of his Vac-u-Tow
kits to try out and detail to my liking.
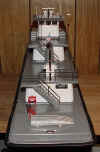
It produces a single screw boat in 1:48 scale of a vessel 85' x 26'. I did every
thing according to the instructions with the kit except for what I mention on
this page. For those of you who have bought this kit, or considering a purchase,
I will show some easy and simple tips to building a more realistic model from
the Vac-u-Tow. All measurements are used using a
1:48 scale rule.
 Click here to visit vac-u-boat
site
Click here to visit vac-u-boat
site
Click on highlighted
images to view larger image
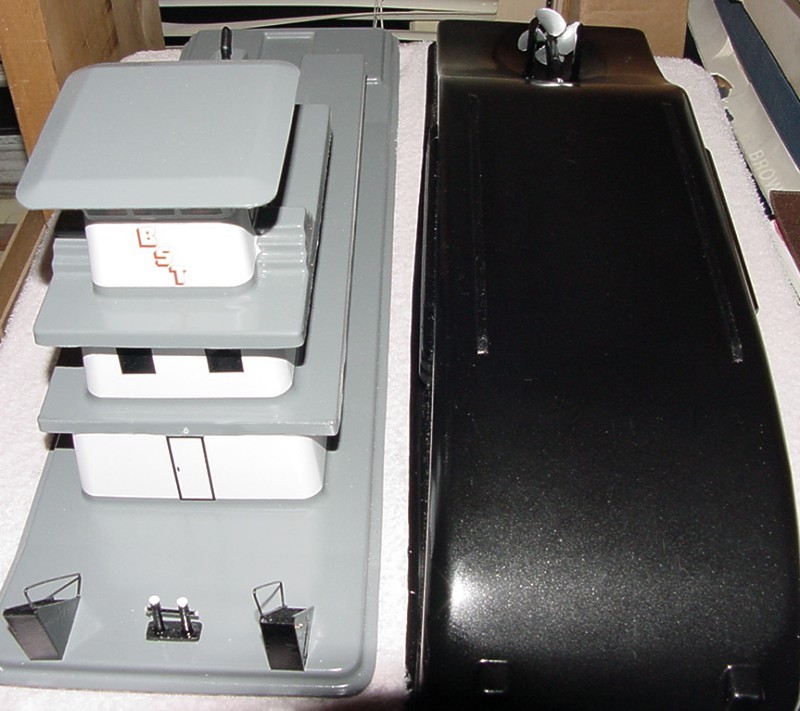
 Starting out I cut out each section as shown in the instructions. I masked off
the cabins one scale foot from the deck. This will produce the "mop
line" whenever I spray paint the deck. I chose to use gray for my decks for
it is a commonly used color on vessels. Red is the second most used color. Be
sure to mask off the entire cabin so overspray doesn't get on the white cabin.
Starting out I cut out each section as shown in the instructions. I masked off
the cabins one scale foot from the deck. This will produce the "mop
line" whenever I spray paint the deck. I chose to use gray for my decks for
it is a commonly used color on vessels. Red is the second most used color. Be
sure to mask off the entire cabin so overspray doesn't get on the white cabin.
 I
used regular Krylon paint. I've had some trouble with their new
"fusion" nozzles. After it dries good it's time to decide how to place
your doors and windows. I opted for experience here. With my general knowledge
of how towboats are laid out, I drew my cabin designs to figure where to
place things. Instead of putting the stairs on the forward deck I opted to put a
sliding door for deck storage and have a ladder to the 2nd deck. I wish I had
thought of it before painting the deck and I would have put in a blank piece of
plastic to fill the stair well void. Oh well, I'll fix it later. I
used regular Krylon paint. I've had some trouble with their new
"fusion" nozzles. After it dries good it's time to decide how to place
your doors and windows. I opted for experience here. With my general knowledge
of how towboats are laid out, I drew my cabin designs to figure where to
place things. Instead of putting the stairs on the forward deck I opted to put a
sliding door for deck storage and have a ladder to the 2nd deck. I wish I had
thought of it before painting the deck and I would have put in a blank piece of
plastic to fill the stair well void. Oh well, I'll fix it later.
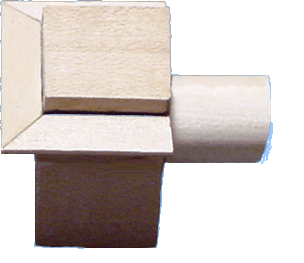
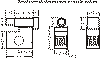
 Here's
a drawing I did to decide where I was going to place my doors and windows. Here's
a drawing I did to decide where I was going to place my doors and windows.
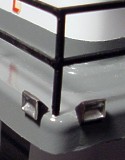
 Before
painting the hull, I decided to put some skin coolers on the hull for more
realism. All you need is some half round tubing, cut each end at a 45, then glue
a piece of plastic on each end. Now glue a few rows on the hull sides and that's
it. Refer to the photos above to see how they turned out. I also added two skids
to the bottom to act as built in stand to avoid scratching up the bottom. Before
painting the hull, I decided to put some skin coolers on the hull for more
realism. All you need is some half round tubing, cut each end at a 45, then glue
a piece of plastic on each end. Now glue a few rows on the hull sides and that's
it. Refer to the photos above to see how they turned out. I also added two skids
to the bottom to act as built in stand to avoid scratching up the bottom.
  After you get the doors and windows in place now's the
time to do something interesting. The kit comes with a clear pilot house so why
not put it to use. Paint the console and wall area light tan or light green. You
can paint the top any color you'd like, but I opted for black.
After you get the doors and windows in place now's the
time to do something interesting. The kit comes with a clear pilot house so why
not put it to use. Paint the console and wall area light tan or light green. You
can paint the top any color you'd like, but I opted for black.
  Here
you can see the radar added since last photos. You can make out the steering
levers fairly well also. Radar was made from a block of balsa wood and a piece
of 3/8" dowel rod for the screen. Here
you can see the radar added since last photos. You can make out the steering
levers fairly well also. Radar was made from a block of balsa wood and a piece
of 3/8" dowel rod for the screen.
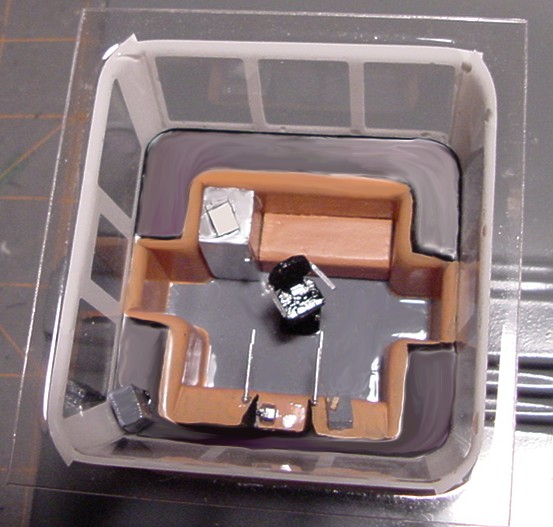
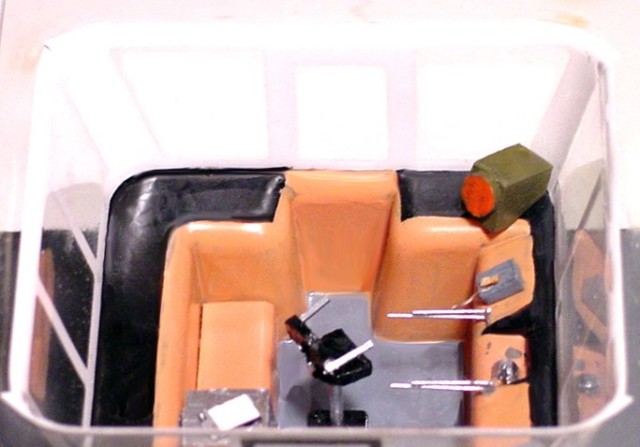
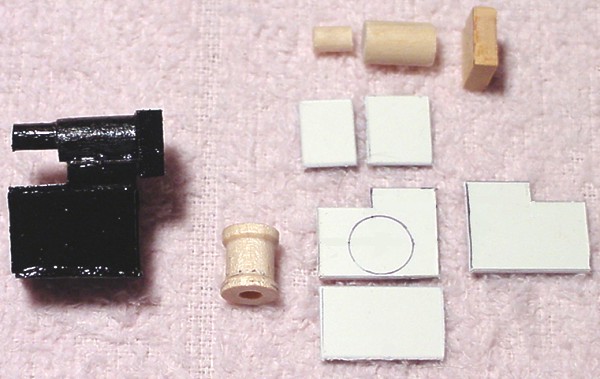
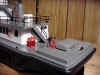
What's the minimum we need for
detailing? I could have went to the
max on the interior, but decided to go with the minimum to help those just
starting out. In the back part I put a small fridge with a clipboard on top and
a settee. These were easy to make from a small block of balsa wood. Just use a
tiny piece of plastic for the fridge handle. The clipboard is a piece of plastic
with a tiny sliver in a general shape of one of those big clips painted
silver.
The console... The
console is molded in. All I did to enhance it was to bring the black paint down
to a point to bring out the angle. Take a piece of wire or brass rod about .020,
no bigger than 1/32", dip it in silver paint and dab onto the console where ever
you want to put a switch. Put one bigger round mark in the upper middle of the
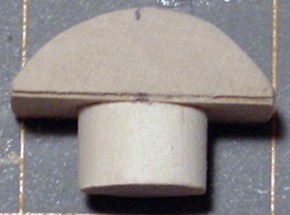
console for the rpm gauge. Next we need a single throttle control. It's just a
small half round piece of wood or plastic with an upside down "L"
shape glued to the right side with the "L" pointed over top of the
half round base.
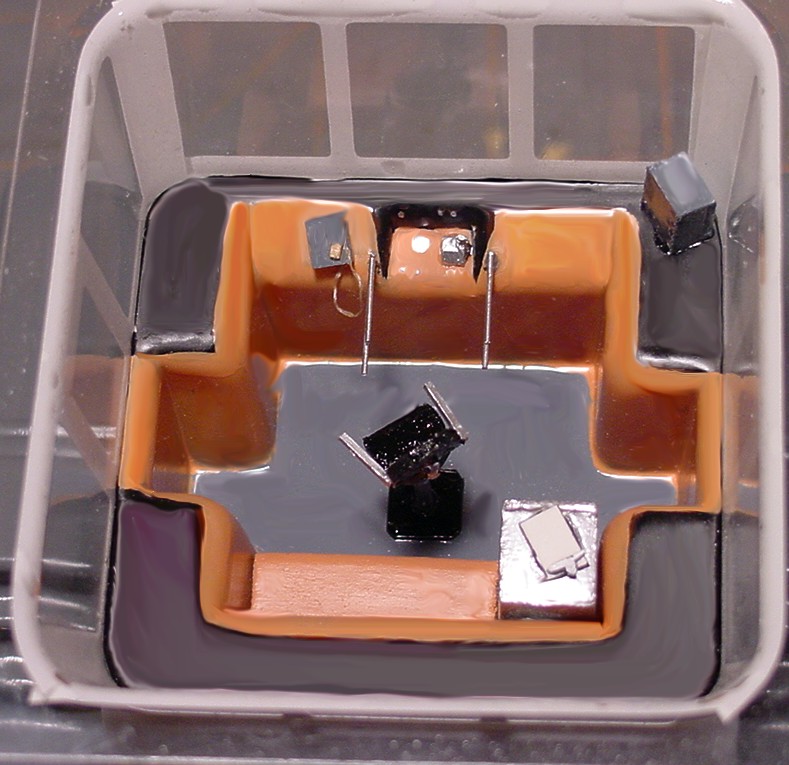
Steering levers... This
vessel has backing (or flanking) rudders. There are four steering levers, two on
each side of the pilot. The long. lower levers steer the main rudder and the
shorter, upper levers steer the backing rudders. To make these use plastic about
.032. You'll need one about 6 scale inches as the vertical post. You'll need one
24 scale inches and one 18 scale inches. These are the steering levers. Glue the
18" piece to the 6" piece to male an "L" After it dries glue
the 24' piece just below the 18". Leave a space about the thickness of the
levers themselves. Once dry, paint silver, drill a small hole on each side of
gauge console and glue the 6" piece down in the hole. (refer
to P. H. photos)
Pilot's seat... Many
vessels of this size have pilot chairs that look like captain chairs in
vans with a higher pedestal. They usually have a heavy base to keep the chair
from tilting over. I made mine with a few plastic rods, a plastic base, and
two pieces of bass wood for the seat and back.
Other items... The
other basics is a radio (with microphone), radar unit, depth sounder unit, spot light controls, and
horn lanyard. I went ahead and added a Boatracs unit. Radio and Boatracs unit
was made from scrap bass wood. The microphone cable was made with raveling from thread.
Boatracs
is a satellite tracking system towing companies use. It is connected to a
computer with a keyboard and the boat gets orders and updates from the
main office.
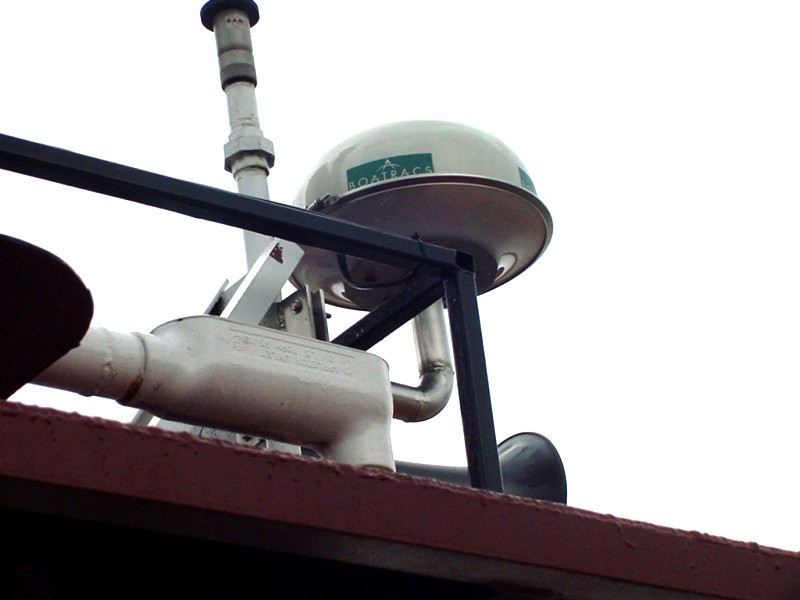
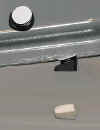
 Here's what the antenna looks like for the Boatracs
system. It's a small dome usually mounted on the front of the pilot house roof.
When you see this small dome you know they have the Boatracs system.
Here's what the antenna looks like for the Boatracs
system. It's a small dome usually mounted on the front of the pilot house roof.
When you see this small dome you know they have the Boatracs system.
 Light controls made
from brass rod, and lanyard made from thread with a little glue dried on the end
as a hand pull. Notice one of the controls is turned toward the middle. When I
mount the spot light on the roof, it will be aimed a little to starboard. The
handle is in line with the light. Also notice I marked off the ceiling in 2'
squares to mimic a 2x2 lay in ceiling tile.
Light controls made
from brass rod, and lanyard made from thread with a little glue dried on the end
as a hand pull. Notice one of the controls is turned toward the middle. When I
mount the spot light on the roof, it will be aimed a little to starboard. The
handle is in line with the light. Also notice I marked off the ceiling in 2'
squares to mimic a 2x2 lay in ceiling tile.
If I want to add more, what else would
I find? A standard boat would have two
radios, river charts, ash trays, fire extinguisher, a stereo like you would have
at home (usually with the speakers mounted in each front corner of the
windshield), binoculars, two radars (don't forget to add two radar antennae on
the roof), and deck winch
control buttons on the console. New additions are Siris and XM satellite music, and the new
Boatracs system. A lot of boats have a toilet inside a cabinet for the
pilot. The front
opens and top tilts back to expose the toilet.
Lettering & name boards... There
are a couple of ways of going about this. Rub on lettering, decals (manufactured
or home made on computer), or plain paper printing. For this application I
decided to use the cheaper paper route just to show how it's done and how it
looks.
First you need to think long and hard
what company name you want to use and what you want to name the vessel. Seems
like every time you make up a company name and apply it to the model, you always
think of one you like better. You may want to mimic a real company that you see
often.
Printers don't always print exactly the colors you see
on your screen, so when you think you've matched the color of the background,
make some copies one and two shades darker and a shade lighter. Most of the time
you'll find the shade darker than you had picked matched best.
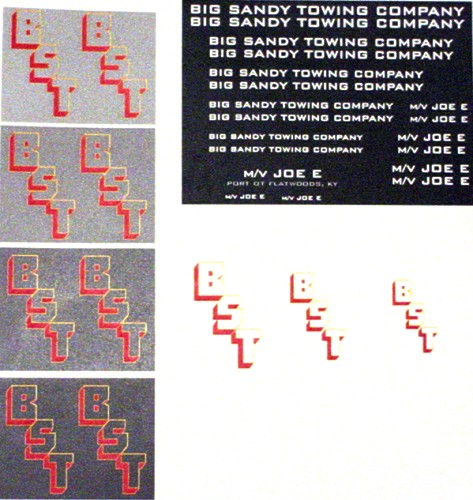
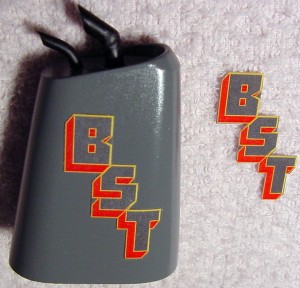
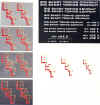 In
the diagram you'll notice I've made my stack logo and chose different shades to
match to the stack. I used the same logo in different sizes for a logo to go on
the front of the pilot house. You'll need to make name boards, tow knee name
board (small), and transom name board with port of call. Do these in different
sizes so you'll have the size you need for the application. In
the diagram you'll notice I've made my stack logo and chose different shades to
match to the stack. I used the same logo in different sizes for a logo to go on
the front of the pilot house. You'll need to make name boards, tow knee name
board (small), and transom name board with port of call. Do these in different
sizes so you'll have the size you need for the application.
I use CorelDraw in my designing, so I can scale every
thing to the scale of the model without having to make several different sizes.
If you have scaling capabilities, you can take measurements from the model to
design your graphics. If not, do what I have shown here.
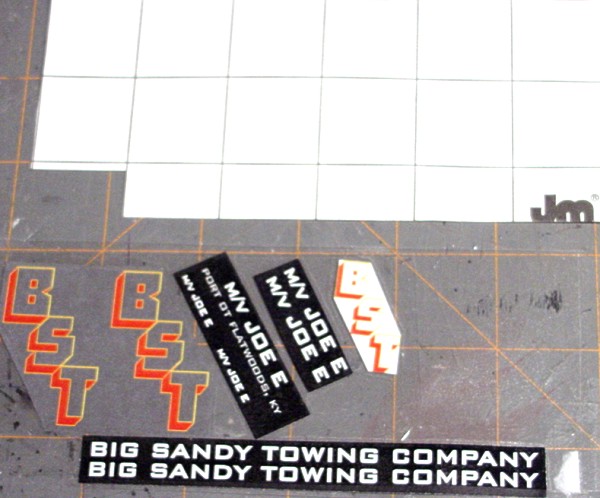
 Once
you have printed your design cut them out. Don't trim close to lettering you'll
need some freeboard. Determined which size suits the model and set them aside.
Dispose of the other pieces so you won't get them confused. Carefully laminate
both sides of the letters since this model will be run in water. After both
sides are laminated good you can cut them out. Once
you have printed your design cut them out. Don't trim close to lettering you'll
need some freeboard. Determined which size suits the model and set them aside.
Dispose of the other pieces so you won't get them confused. Carefully laminate
both sides of the letters since this model will be run in water. After both
sides are laminated good you can cut them out.
On the lettering paint the edge to keep any water
from seeping into the paper. Use black paint with lettering with black
background so a white line won't appear once it is glued to a black surface.
Also uhen used as name boards on hand railing paint the back black.
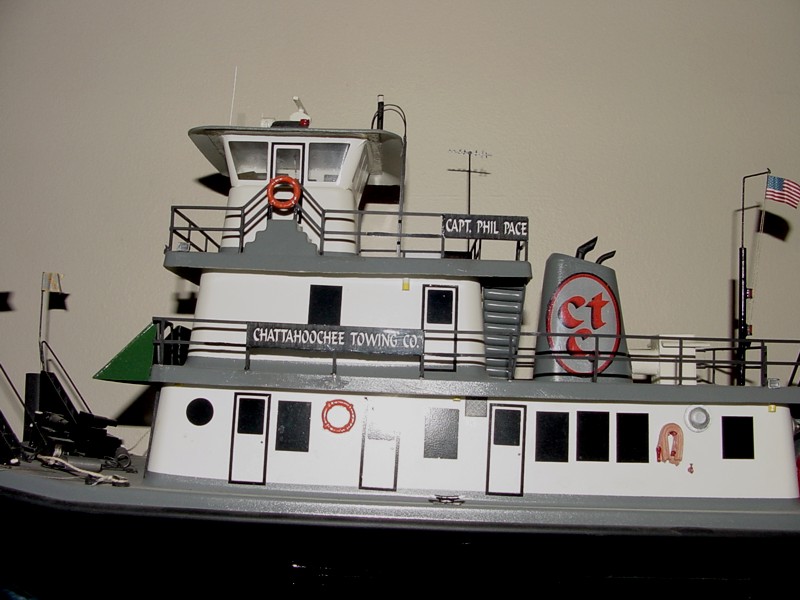
 Here
is the stack with the stack logo and the trimmed logo beside it. I put the logo
on with CA glue. If you're wondering which font I used for the logo, it was Pioneer-BT Here
is the stack with the stack logo and the trimmed logo beside it. I put the logo
on with CA glue. If you're wondering which font I used for the logo, it was Pioneer-BT
I made the small exhaust pipe
for the generators by bending a piece of
brass rod. The main stack is brass tubing that I cut a small notch in, bent
together, then soldered into place. I drilled holes and used epoxy to glue into
place.
 Boats
usually have a galley and we need an exhaust vent for the range. My galley is on
the stern, port side, so I added a vent where the range would be. How to build
tip is on the On Deck page. Boats
usually have a galley and we need an exhaust vent for the range. My galley is on
the stern, port side, so I added a vent where the range would be. How to build
tip is on the On Deck page.
 I just had to make a modification to the 2nd deck. I
brought the deck back to cut off the stair well. You'll see why I wanted
to do this later in the build. Another change made is a pin
in the center of the overhang that will go into the lower cabin to hold
the deck in place. I opted to do this instead of using
the Velcro tabs provided
in the kit.
I just had to make a modification to the 2nd deck. I
brought the deck back to cut off the stair well. You'll see why I wanted
to do this later in the build. Another change made is a pin
in the center of the overhang that will go into the lower cabin to hold
the deck in place. I opted to do this instead of using
the Velcro tabs provided
in the kit.
 Prototypes
need an access hatch to be able to remove engines
and transmissions. To make this, cut a sheet of plastic a scale 10 1/2' long by
7' wide. place bolt patterns around the edge to make it appear to be bolted down
(I made white bolts so you can see them) Bolts
are painted the same color as the deck. Glue the stack onto the
"hatch" then glue onto deck. Prototypes
need an access hatch to be able to remove engines
and transmissions. To make this, cut a sheet of plastic a scale 10 1/2' long by
7' wide. place bolt patterns around the edge to make it appear to be bolted down
(I made white bolts so you can see them) Bolts
are painted the same color as the deck. Glue the stack onto the
"hatch" then glue onto deck.
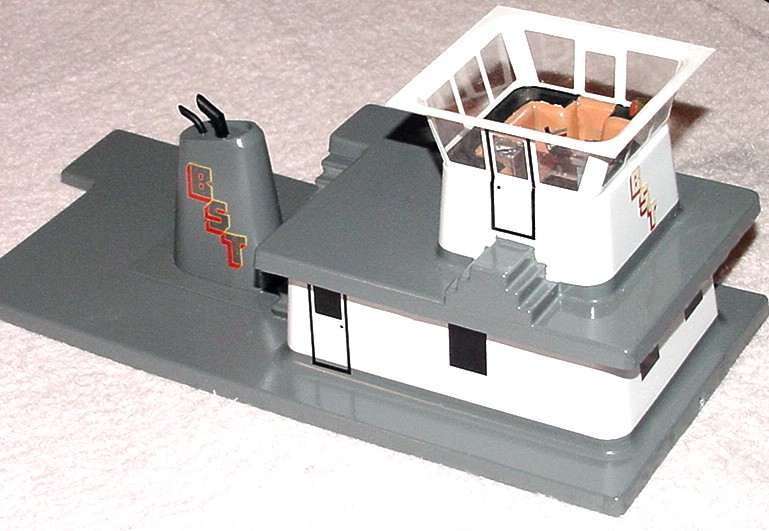
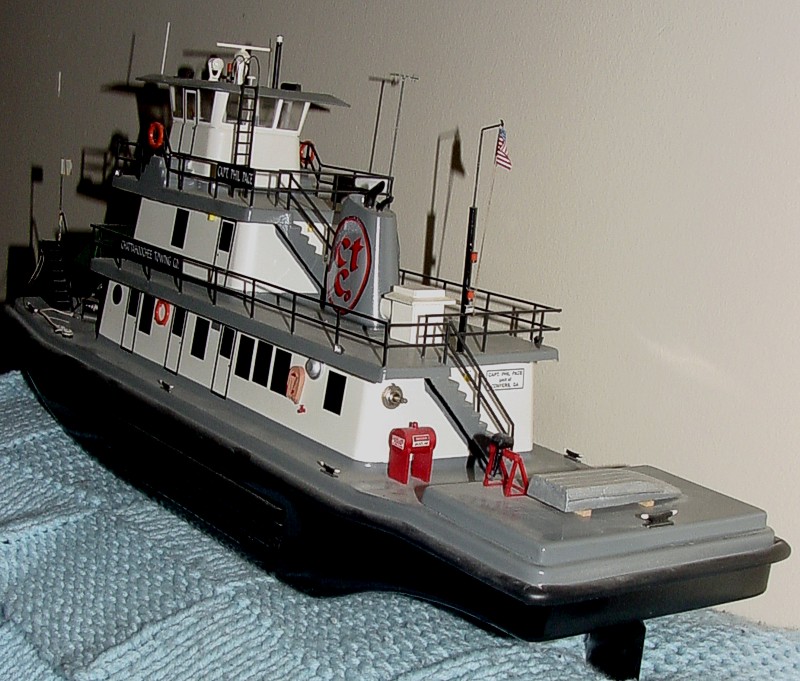
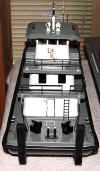
 Here's how it looks so far. The logo
is on the front of the pilot house tow knees and H
bitt in place. You can see the pin glued into the
center of the modified 2nd deck that holds it to the main cabin. You can just see
the two skids on the bottom of the hull used as
built in stand to avoid scratching up bottom.
Here's how it looks so far. The logo
is on the front of the pilot house tow knees and H
bitt in place. You can see the pin glued into the
center of the modified 2nd deck that holds it to the main cabin. You can just see
the two skids on the bottom of the hull used as
built in stand to avoid scratching up bottom.
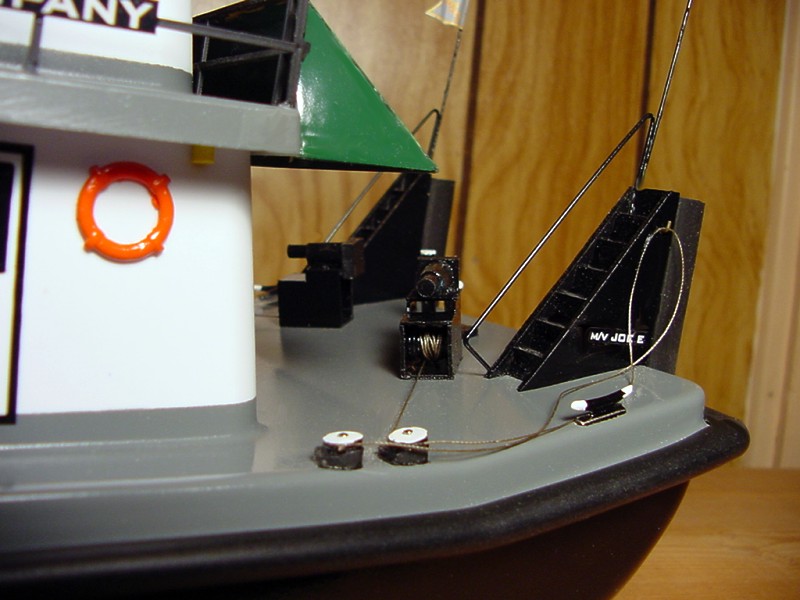
 Roller
chocks and buttons are needed for the wires to run from the winches to the barge. I
used a 1/4" sheave and a piece of balsa wood sanded at an angle as in the
photo. I'm placing two on each side. Normally, on larger vessels, there would be
three or more. To provide more strength, glue a block of wood below deck and
drill a small hole in the middle of the sheave and through deck to drive a straight pin
into the block or you can use a servo mounting screw. Roller
chocks and buttons are needed for the wires to run from the winches to the barge. I
used a 1/4" sheave and a piece of balsa wood sanded at an angle as in the
photo. I'm placing two on each side. Normally, on larger vessels, there would be
three or more. To provide more strength, glue a block of wood below deck and
drill a small hole in the middle of the sheave and through deck to drive a straight pin
into the block or you can use a servo mounting screw.
 Here's a button and roller chock on
the mv/ Tristan B. The cables used on a winch and for making tow are
called wires. The wire runs from the winch through the roller chock, out over
the cavil, bitt, or button on a barge, then back to the button. Usually an
"eye" is made on the end of the wire and made tight to the button so
that it doesn't slip off. When pushing a large tow a "double
wire" will be made which means the wire will go from winch, around
roller chock, then around, cavil, bitt, or button on barge, back around another
roller chock (or the button in this case) and the eye of the wire makes up to
the barge.
Here's a button and roller chock on
the mv/ Tristan B. The cables used on a winch and for making tow are
called wires. The wire runs from the winch through the roller chock, out over
the cavil, bitt, or button on a barge, then back to the button. Usually an
"eye" is made on the end of the wire and made tight to the button so
that it doesn't slip off. When pushing a large tow a "double
wire" will be made which means the wire will go from winch, around
roller chock, then around, cavil, bitt, or button on barge, back around another
roller chock (or the button in this case) and the eye of the wire makes up to
the barge.
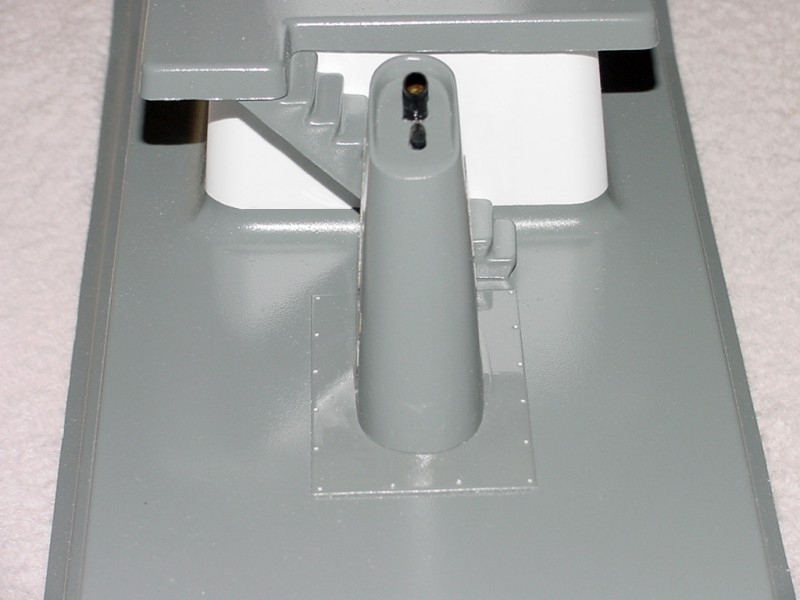
 Here's
the main engine air intake made from a scale
5'6"x3'x3' piece of balsa wood with thin bass wood a scale 1' wide glued at
a slight angle for a drip eave on three sides and a 1/2" dowel rod cut to
go between the intake and stack. The intake mounts just behind the deck plate
with the stack. Here's
the main engine air intake made from a scale
5'6"x3'x3' piece of balsa wood with thin bass wood a scale 1' wide glued at
a slight angle for a drip eave on three sides and a 1/2" dowel rod cut to
go between the intake and stack. The intake mounts just behind the deck plate
with the stack.
  I
made a deck latch to keep the 2nd deck in place and
to make it easy to access the interior components. It's just simply a brass rod
sliding inside a plastic tube glued to the bottom of the 2nd deck. By drilling a
small hole in the bottom of the intake it will be hidden and the intake will
keep it from sliding forward. Remember on the front of the deck I glued a pin to
slide in a hole in the top of the main cabin. I
made a deck latch to keep the 2nd deck in place and
to make it easy to access the interior components. It's just simply a brass rod
sliding inside a plastic tube glued to the bottom of the 2nd deck. By drilling a
small hole in the bottom of the intake it will be hidden and the intake will
keep it from sliding forward. Remember on the front of the deck I glued a pin to
slide in a hole in the top of the main cabin.
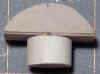
 The yawl
was carved from a block of balsa wood and .020 plastic strip glued on. it will
lay upside down on the stern and will be used as a knob to open the
steering gear access. You can paint it white or aluminum. usually the
name of the vessel is placed on each side of the yawl toward the bow. A drawing
for a yawl can be found on the On Deck
page. The yawl
was carved from a block of balsa wood and .020 plastic strip glued on. it will
lay upside down on the stern and will be used as a knob to open the
steering gear access. You can paint it white or aluminum. usually the
name of the vessel is placed on each side of the yawl toward the bow. A drawing
for a yawl can be found on the On Deck
page.
If you're an experienced scratch builder maybe you'll
want to go all out and build a detailed yawl from the drawings. A finished yawl
can be viewed on the G L FURR page.
 Here's the finished yawl painted aluminum with an
outboard motor on a stand. It also helps me to know which way to turn the boat
to open the hatch. The motor stand is made from strip bass wood. You can use
strip plastic if you want. The motor is carved from a small block of balsa with
a tapered piece of bass wood glued on for the shaft. The prop was cut from a
thin piece of plastic.
Here's the finished yawl painted aluminum with an
outboard motor on a stand. It also helps me to know which way to turn the boat
to open the hatch. The motor stand is made from strip bass wood. You can use
strip plastic if you want. The motor is carved from a small block of balsa with
a tapered piece of bass wood glued on for the shaft. The prop was cut from a
thin piece of plastic.
 Here is the latch system I made to hold the steering
gear access hatch in place. I used a couple pieces of plastic tube, two pieces
of wire for the latches, and a servo arm screwed into the bottom of the jon boat.
After you have put your screw hole into the boat, take the screw back out and
put a little epoxy in so the screw won't work loose. It also wouldn't hurt to
put a little epoxy on the screw head and arm to keep it from slipping. Make
sure the hole in the access hatch is bigger than the screw so it won't foul.
Here is the latch system I made to hold the steering
gear access hatch in place. I used a couple pieces of plastic tube, two pieces
of wire for the latches, and a servo arm screwed into the bottom of the jon boat.
After you have put your screw hole into the boat, take the screw back out and
put a little epoxy in so the screw won't work loose. It also wouldn't hurt to
put a little epoxy on the screw head and arm to keep it from slipping. Make
sure the hole in the access hatch is bigger than the screw so it won't foul.
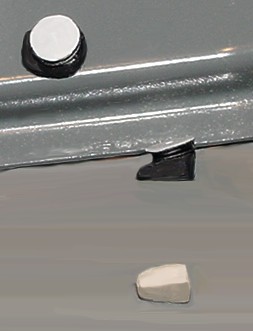
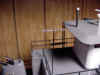
 To put hand railing on the boat I purchased 3 pieces Plastruct
hand railing (HRS-8) and 1 piece of Plastruct
stair railing (SRS-8). I masked off the bottom rail and painted the railing.
When dry, I proceeded to cut off the bottom rail vertically with the stanchion
portion of the railing (see photo, bottom railing is uncut). I used the railing
to make where to drill the holes in the deck for the stanchions to glue into.
To put hand railing on the boat I purchased 3 pieces Plastruct
hand railing (HRS-8) and 1 piece of Plastruct
stair railing (SRS-8). I masked off the bottom rail and painted the railing.
When dry, I proceeded to cut off the bottom rail vertically with the stanchion
portion of the railing (see photo, bottom railing is uncut). I used the railing
to make where to drill the holes in the deck for the stanchions to glue into.
The other item in the photo is how I make fake guard
lights. It's 1/8" dowel rod cut in scale 10" lengths, painted white,
then I paint about 2/3rds of it yellow to represent the light globe with a
yellow bulb glowing in it.
 Here's a simple and easy winch
to build. Using some sheet plastic, 1/4" dowel rod. 1/8" dowel rod, a
piece of 1/8" bass or balsa wood, and a 3/8"x 1/2" mini spool from a
crafts store. A good looking wire is Charcoal Gray #942-1220 rayon thread made
by Sulky.
Here's a simple and easy winch
to build. Using some sheet plastic, 1/4" dowel rod. 1/8" dowel rod, a
piece of 1/8" bass or balsa wood, and a 3/8"x 1/2" mini spool from a
crafts store. A good looking wire is Charcoal Gray #942-1220 rayon thread made
by Sulky.
 Here's
a drawing for a simple winch. Here's
a drawing for a simple winch.
You'll need to build two winches.
 Here's a view of a finished winch mounted on the bow deck.
 Here's
a simple way to make halogen flood lights. Use
1/8" plastic angle and cut to 10 scale inch lengths. Glue thin styrene on
the ends. The photo shows the way I do it. I glue them all on one piece, let
dry, then trim. Then I repeat the process for the other side. Here's
a simple way to make halogen flood lights. Use
1/8" plastic angle and cut to 10 scale inch lengths. Glue thin styrene on
the ends. The photo shows the way I do it. I glue them all on one piece, let
dry, then trim. Then I repeat the process for the other side.
When everything is trimmed paint the outside black and
the inside silver.
 Here's
what the finished floods look like. You'll need 7 floods. Two facing forward,
two facing port (one fwd., one aft), two facing starboard (one fwd., one aft),
and one on the stern light pole/flag staff facing the stern. Here's
what the finished floods look like. You'll need 7 floods. Two facing forward,
two facing port (one fwd., one aft), two facing starboard (one fwd., one aft),
and one on the stern light pole/flag staff facing the stern.
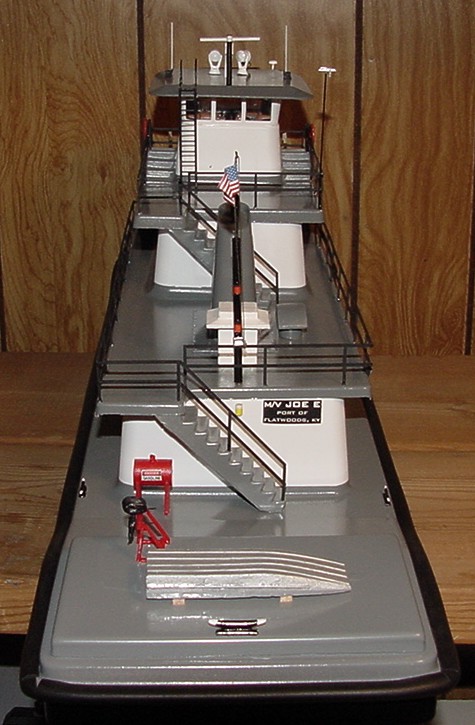
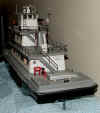
 Getting close to finished. In this view you can see the
roller chocks, winches, H bitt, cavils, spot lights, nav. lights, floods, bell, and
anchor lights. Notice the ladder added where once was a cut out for a stair
well. I wanted to do this to add a "doghouse" (where deckhands rest,
barge lights, and other miscl. deck equipment is stored) door that opens onto
the bow deck. I cut the ladder off just below the 2nd deck so the deck will be
easy to remove. I glued two little pieces of remnant hand railing as brackets to
hold the ladder off the cabin wall.
Getting close to finished. In this view you can see the
roller chocks, winches, H bitt, cavils, spot lights, nav. lights, floods, bell, and
anchor lights. Notice the ladder added where once was a cut out for a stair
well. I wanted to do this to add a "doghouse" (where deckhands rest,
barge lights, and other miscl. deck equipment is stored) door that opens onto
the bow deck. I cut the ladder off just below the 2nd deck so the deck will be
easy to remove. I glued two little pieces of remnant hand railing as brackets to
hold the ladder off the cabin wall.
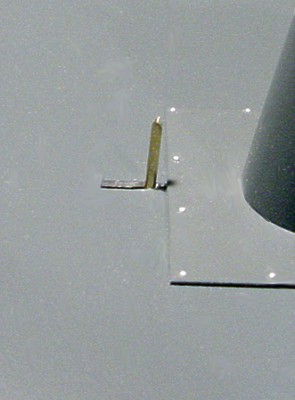
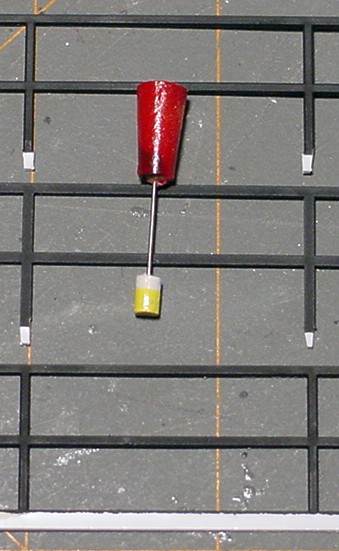
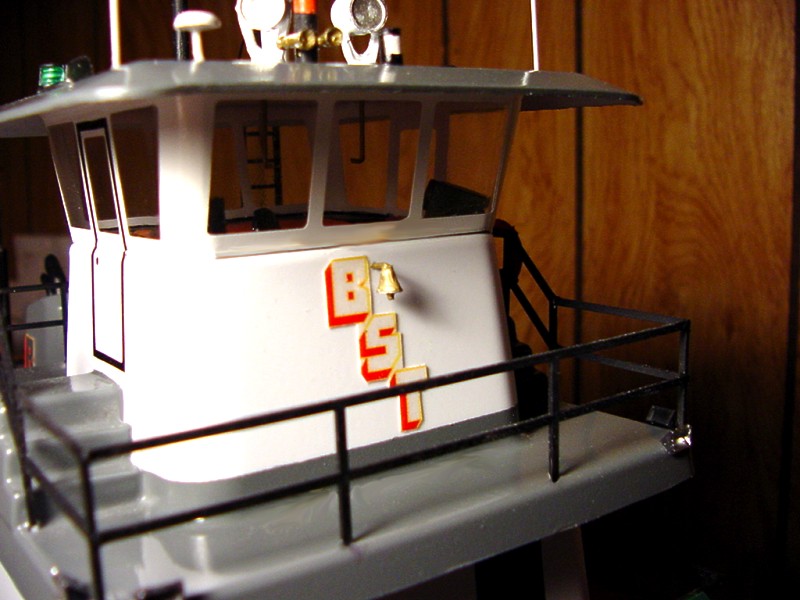
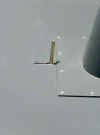
 I affixed the bell by filing the top flat,
drilling a 1/32" hole in it and gluing in an "L" shaped piece of
brass rod. I then drilled a hole in the pilot house and glued the bell. Make the
brass rod long enough so the bell can be kept away from the wall.
I affixed the bell by filing the top flat,
drilling a 1/32" hole in it and gluing in an "L" shaped piece of
brass rod. I then drilled a hole in the pilot house and glued the bell. Make the
brass rod long enough so the bell can be kept away from the wall.
 A canopy will be mounted to
the top railing and extend down to the 2nd deck. Notice the notch cut out for
ladder access. It's hard to see, but if you look close you'll notice the bottom
of the canopy sides are a 90 degree angles at the bottom, but angle to the top
of the canopy angle. In other words the bottom sitting on the mat is a
"C" shape. The sheet for the front was cut at a scale 20' x 17 3/4' x
6'. Most are painted green, but I have seen a few blue, and red ones.
A canopy will be mounted to
the top railing and extend down to the 2nd deck. Notice the notch cut out for
ladder access. It's hard to see, but if you look close you'll notice the bottom
of the canopy sides are a 90 degree angles at the bottom, but angle to the top
of the canopy angle. In other words the bottom sitting on the mat is a
"C" shape. The sheet for the front was cut at a scale 20' x 17 3/4' x
6'. Most are painted green, but I have seen a few blue, and red ones.
 The engine room get very hot so we need an exhaust
vent for there. There are many different types. An easy one is a
1/2" dowel rod with a piece of balsa block cut half round 4' x 2 1/4' You
can paint it white or gray (if you have gray decks)
The engine room get very hot so we need an exhaust
vent for there. There are many different types. An easy one is a
1/2" dowel rod with a piece of balsa block cut half round 4' x 2 1/4' You
can paint it white or gray (if you have gray decks)
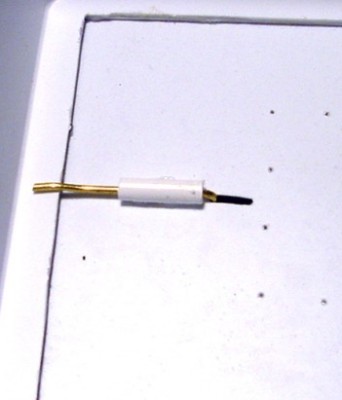
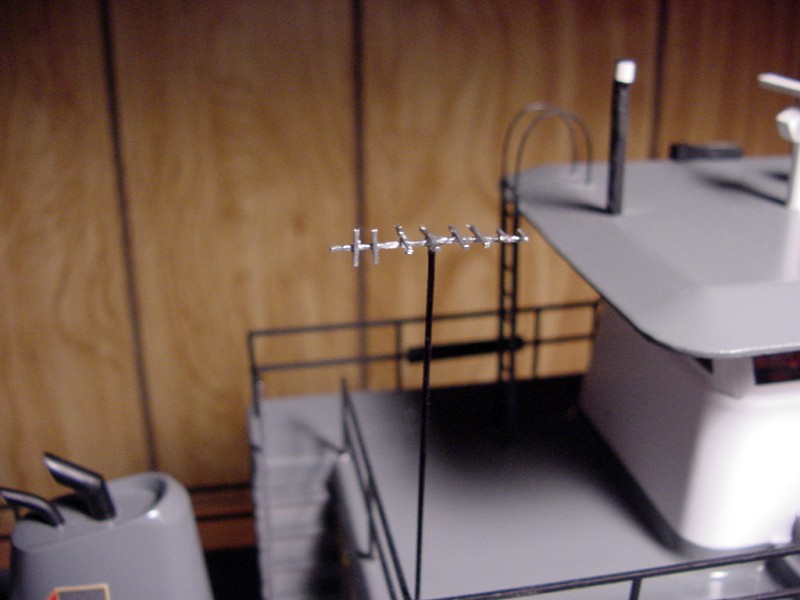
 I made a quick T V antenna out of strip plastic. Most
boats now-a-days have DISH network on board. You can build a large dome on a
three leg mast in place of a antenna. Refer to G L FURR
model to see a DISH antenna.
I made a quick T V antenna out of strip plastic. Most
boats now-a-days have DISH network on board. You can build a large dome on a
three leg mast in place of a antenna. Refer to G L FURR
model to see a DISH antenna.
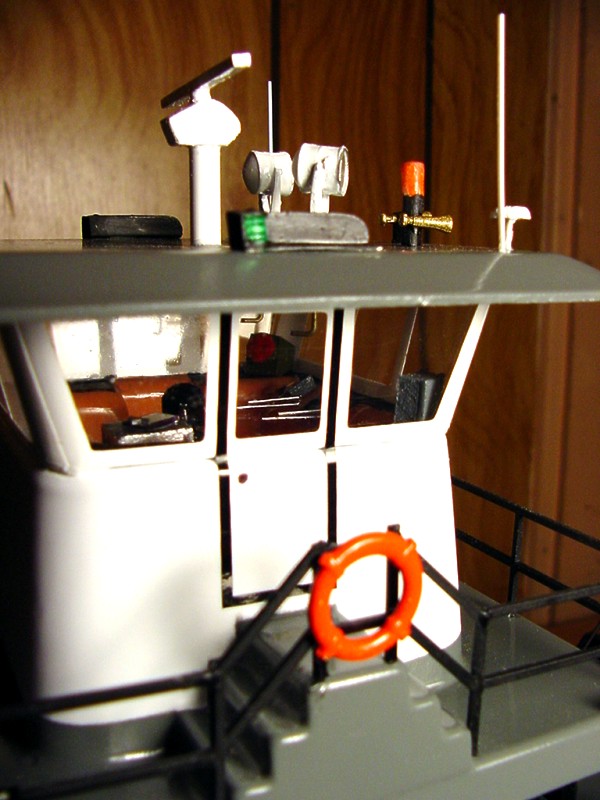
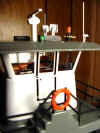 Here's a view of the pilot house looking in from
starboard.
Here's a view of the pilot house looking in from
starboard.
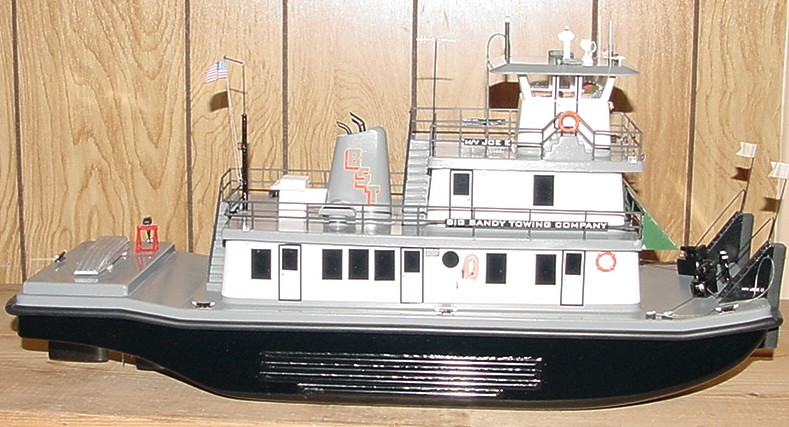
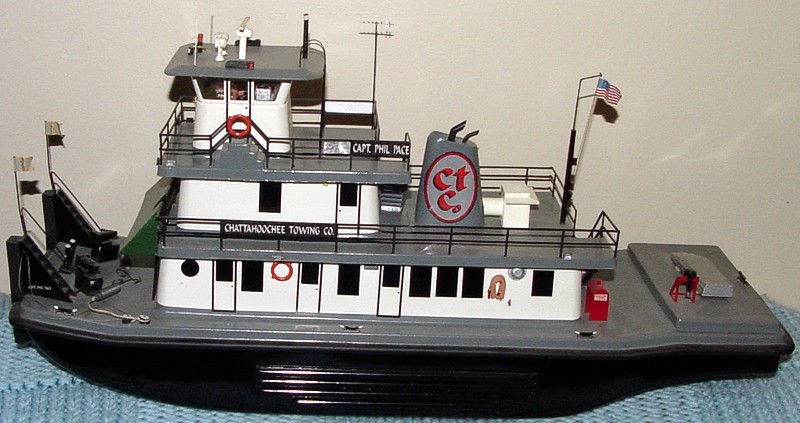
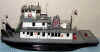
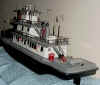
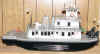 Here are photos of the finished model. Life rings and fire
stations really add the the over all look. You can see the engine room exhaust
vent beside the stack in this photo.
Here are photos of the finished model. Life rings and fire
stations really add the the over all look. You can see the engine room exhaust
vent beside the stack in this photo.
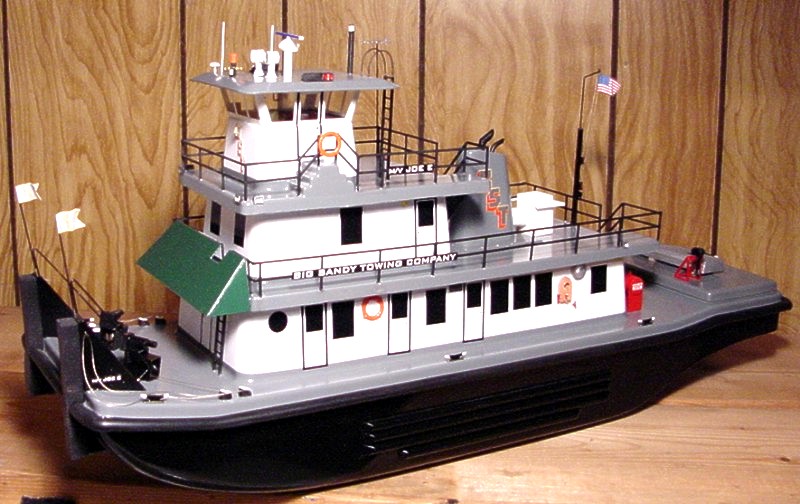
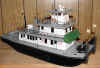
 In this photo you can see how the canopy fits and the
ladder access looks now.
In this photo you can see how the canopy fits and the
ladder access looks now.
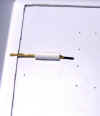
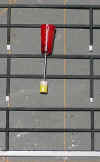
 Here you can see the 1/8" hose valve beside the hose
rack. A simple touch that adds to the looks. I just drill a 1/32" hole and
glued to valve into place.
Here you can see the 1/8" hose valve beside the hose
rack. A simple touch that adds to the looks. I just drill a 1/32" hole and
glued to valve into place.
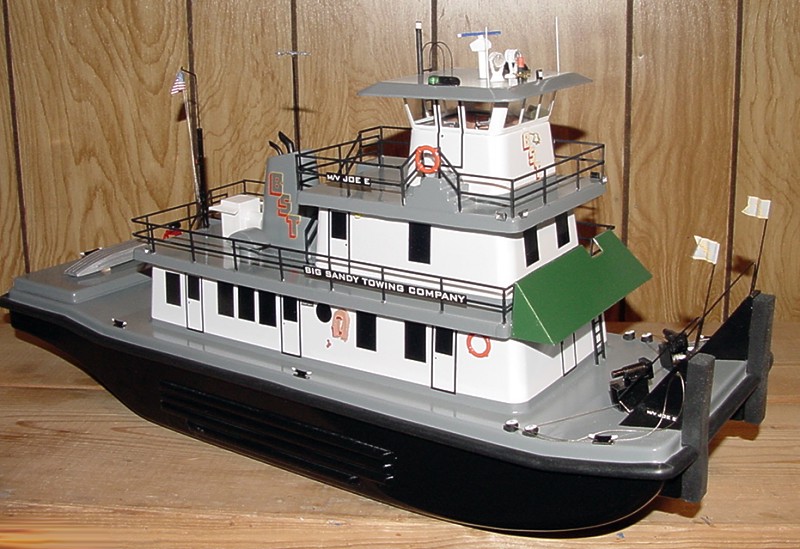
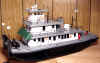
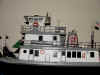
 You can see the winches, bell and H bitt good in this bow
view.
You can see the winches, bell and H bitt good in this bow
view.
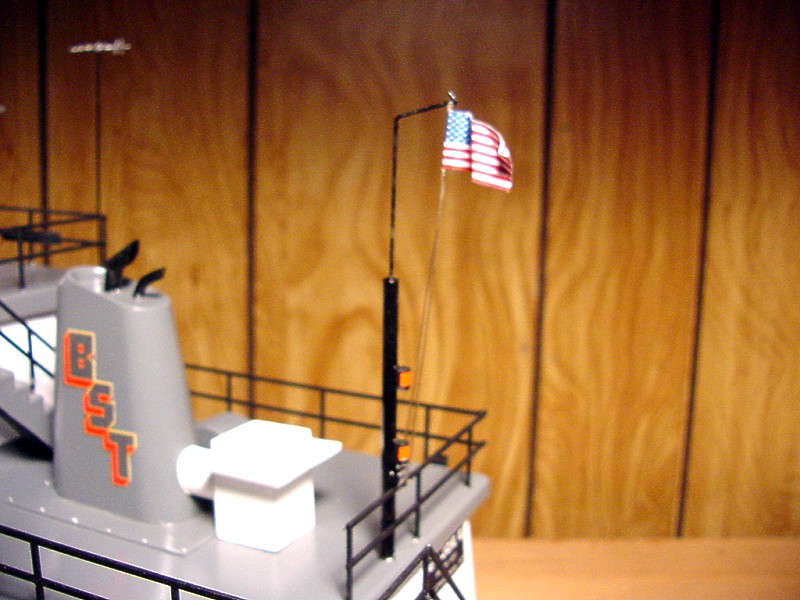
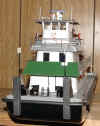
 Here's how it all looks from the stern. I make my own flags
on the computer. Just make a reversed copy and mate them back to back so your
flag will be on both sides. Then use some rayon thread and fold the paper over
and match the two sides together. Use a good metal edge, like the back of a
razor blade, to rub the flag against the thread. I have always had good luck
using regular Testor's plastic glue to glue the flag back to back. After it
dries, hold the flag at the thread end wit needle nosed pliers and fold and manipulate
the flag until it looks like its flying in the wind.
Here's how it all looks from the stern. I make my own flags
on the computer. Just make a reversed copy and mate them back to back so your
flag will be on both sides. Then use some rayon thread and fold the paper over
and match the two sides together. Use a good metal edge, like the back of a
razor blade, to rub the flag against the thread. I have always had good luck
using regular Testor's plastic glue to glue the flag back to back. After it
dries, hold the flag at the thread end wit needle nosed pliers and fold and manipulate
the flag until it looks like its flying in the wind.
 Closer view of the flagstaff and flag.
 A good view of the outboard motor on
stand and the gasoline tank. You can also
see the galley vent and the port
fire station. Take note of the larger cavil
on the stern.
A good view of the outboard motor on
stand and the gasoline tank. You can also
see the galley vent and the port
fire station. Take note of the larger cavil
on the stern.
Every thing is scratch built except for a few purchased
items from Bluejacket
Shipcrafters. Here's a list of items. I also purchased a set of diesel air
horns at a local model train hobby shop.
6 item#
F0062 5/8"
CLEATS
1 item#
F0160 7/8"
CLEAT
4 item# F0208 11/16"
LIFE RINGS
2 item# F0796.3
1/4" HOSE ON RACK
2 item# F0863.4
1/8" HOSE VALVE
1 item# F0113 3/4"
RUNNING LIGHTS
1 item# FO489
3/16"
BELL
I used two spotlights I already had. A
good spotlight choice would be item# F0122. You can use it as the carbon arc
design it is, or for a modern Zeon spotlight, file off the cooling fins on the
top and bottom of the light. Remember to buy two lights.
I hope I have given
you some ideas for detailing your vac-u-tow. I'd like to see photos of your
creations so email them to me
towboatjoe@yahoo.com Remember when it goes to scratch
building, all you need is some photos of the object and think, "How can I
reproduce that?" You'll find that if you just sleep on it and roll it over
in your mind for a few days, all at once it'll hit you and you'll realize it's
not as hard to do as you once thought. Before you know it you'll start to throw
an item away and think "I can make such and such out of that!"
Some river termology...
You have noticed I have mentioned cabins, walls, toilets, etc. instead of
superstructure, bulkheads, or head. A lot of people working on the boats,
even today, are plain simple country folk, (that's why they have such good
cooking on these boats). Even back 150 years ago some boats were built in
fields. You'll find a lot of terms come over from steamboat days, such as wheel.
Novices call it a prop, seamen call it a screw. River men still call it a wheel
from the old paddle wheel days. When an ole' river rat talked in river slang, if
you listened carefully, you could figure out what he was talking about for many
things were named in relation to what they did. For instance a "monkey
rudder" was named such because it hooked to the steering rudders and
moved with them. The old saying was popular back then, "monkey see, monkey
do", and so they decided that would be a good name for the rudders cause
they copied the main rudders.
UPDATE
! ! ! I
commemorated Phil Pace of Vac-u-boat by renaming the vac-u-tow in his namesake.

Click on thumbnails for larger image. |